Table of Contents
AirFlash for the Pi Zero

What is the AirFlash?
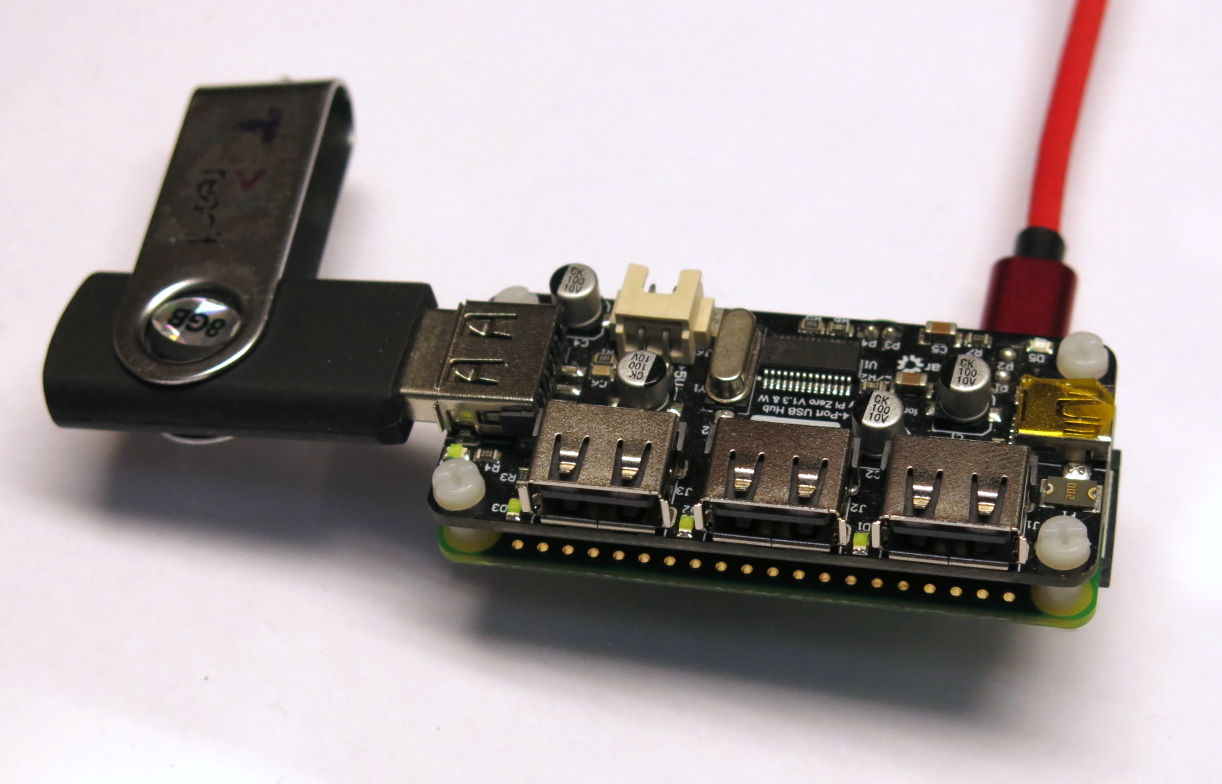
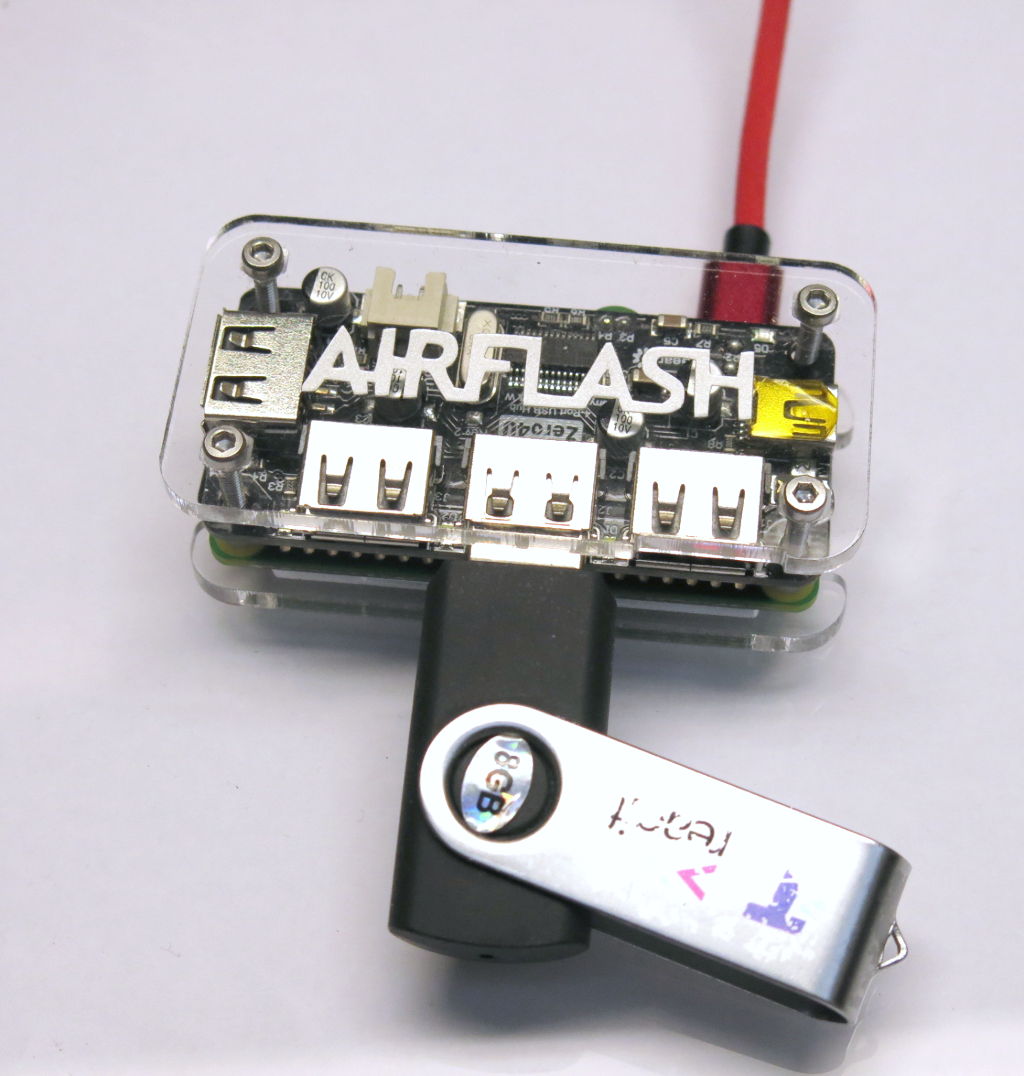
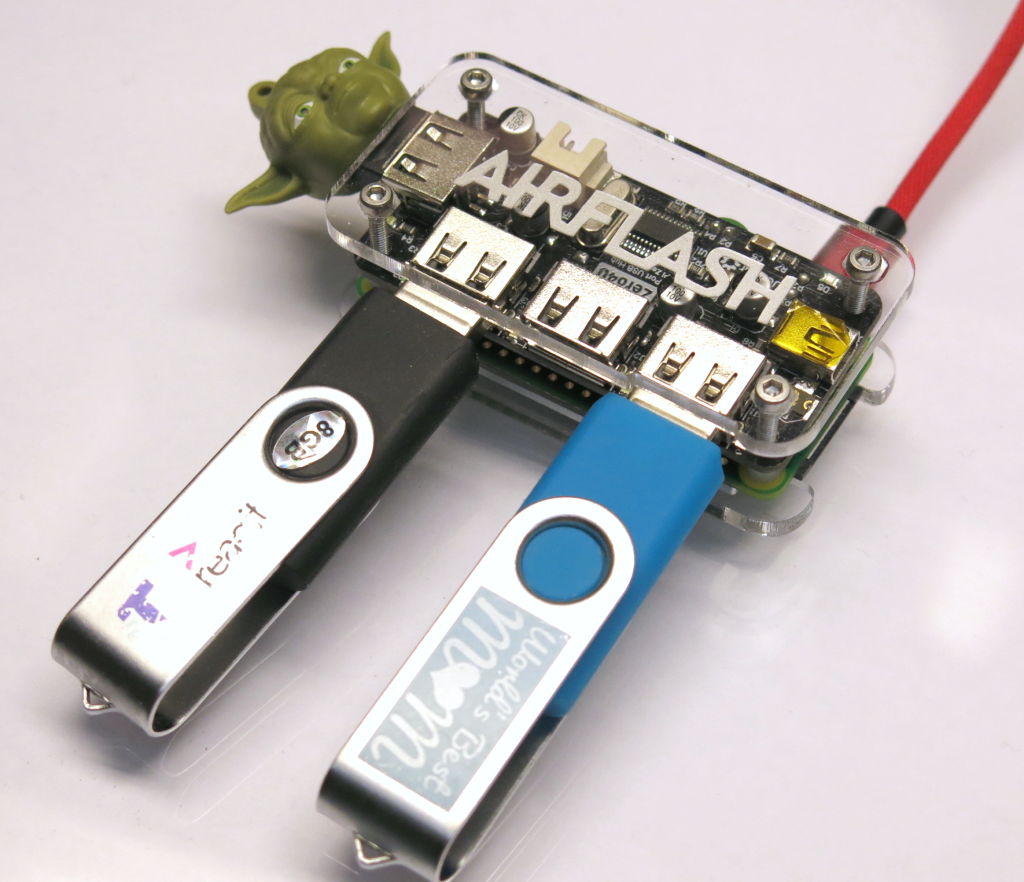
The AirFlash is an open-source standalone USB powered device that accepts up to four USB Flash drives and will serve their content out over WIFI to one or more users. You can take it anywhere and plug it in to a USB power source. Within 90 seconds the device will be available.
Security is at a minimum. The WIFI password should be conveniently printed on the underside of the device for nearby users to gain access from their own computers.
If you are just after assembly instructions and a pre-configured image for your SD Card, see the appropriate sections below.
What use is this?
Great question. There are a couple of basic cases where the AirFlash comes in very handy. You may work for an organisation that does not allow USB flash drives or sticks to be inserted into a corporate laptop. It could be difficult getting your latest podcast onto your USB MP3 player in the car. Or bringing in photos for the office celebration. Remember, it is advised to speak to your IT department first.
You can plug the AirFlash into any nearby USB port (to provide power to the device), connect to the WIFI access point called AirFlash, and using your file manager copy your files across to whichever USB stick is connected to the AirFlash.


Another good use case is when you are at a LAN party and everyone needs access to the same map packs and patches for a particular game. By leaving the AirFlash plugged in somewhere at the party, everyone can connect to it and pull down what is required.
While the party host could just as easily open a share on his drive, they are usually patching and rebooting like the rest of us. And second, there is always that one person who can just never connect to the share. You know that person.
Having a separate, portable, dedicated share is a handy tool to keep in your kit.
Parts required
You will need the following off-the-shelf parts which can be sourced from the following vendors:
- Raspberry Pi Zero W - https://core-electronics.com.au/raspberry-pi-zero-w-wireless.html
- 22mm M2.5 Hex bolts - https://www.aliexpress.com/item/32859007238.html
- USB Mini cable
- USB flash stick
- HDMI adapter to suit the Pi Zero W - https://core-electronics.com.au/mini-hdmi-to-standard-hdmi-jack-adapter-for-raspberry-pi-zero.html
![]()
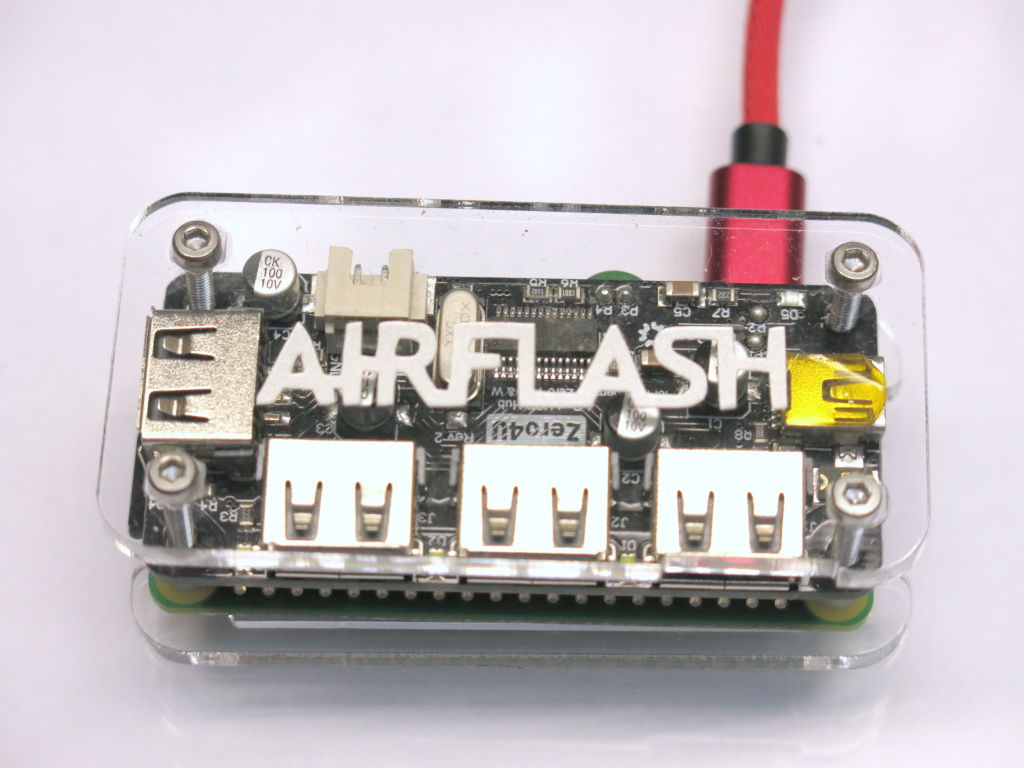
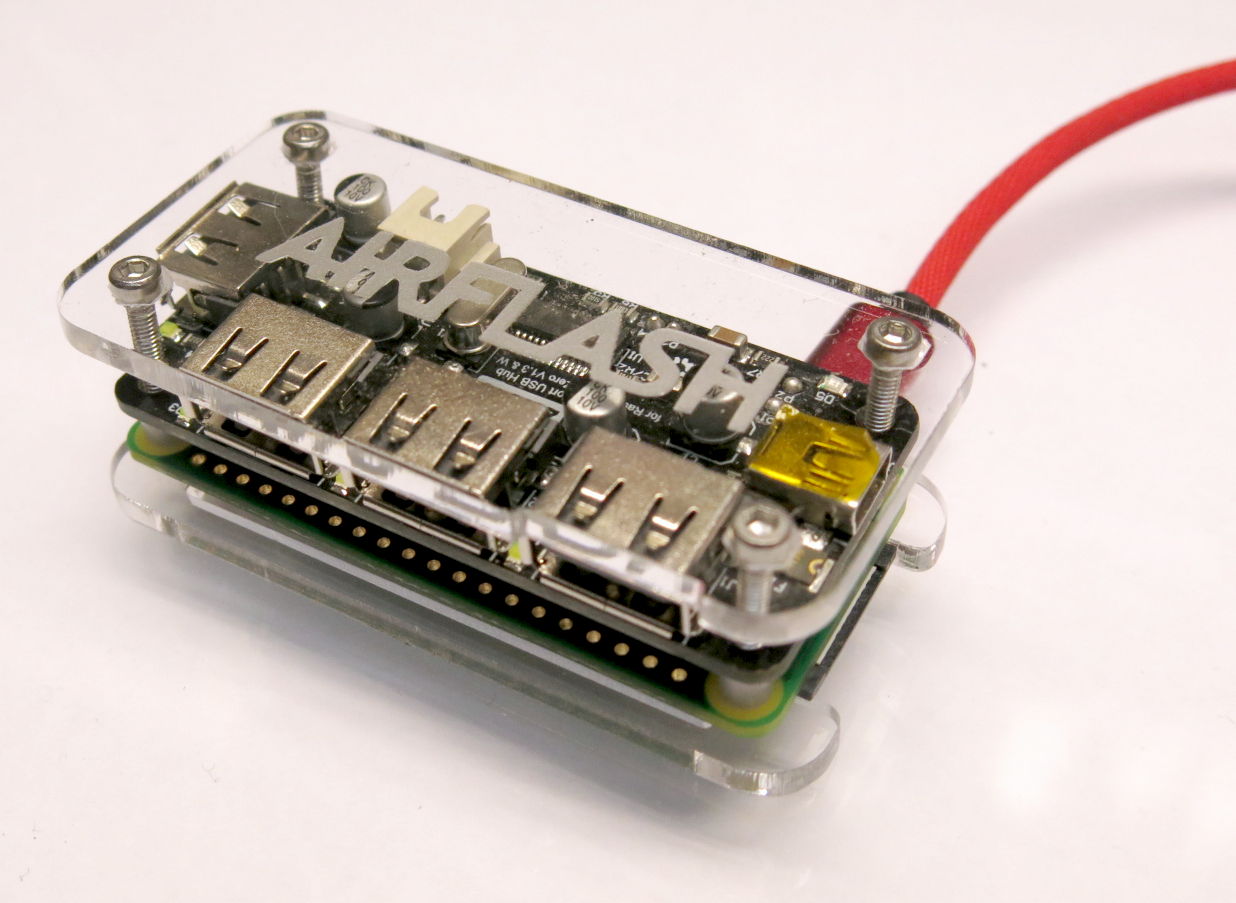
Huge thanks to my friend Sharm for producing the AirFlash case prints.
Assembly
For assembly instructions for the Pi Zero W and the Zero4U 4-Port USB Board, see the manual here: http://www.uugear.com/doc/Zero4U_UserManual.pdf
Testing the board with a USB Flash Drive
Once assembled, you can connect a mini-usb cable from your PC to the data USB on the Pi. You can connect a USB flash drive to any of the four USB ports (even without any working OS SD Card inserted), and the device will mount and directly serve the USB flash drive.
I just want a pre-built image
If you just want a working AirFlash setup, you can download this image that I made already set up and running.
This is the fastest way to make an AirFlash.
You can download the AirFlash image, unzip and flash it using a tool like ImageUSB by Passmark or Rufus to your SD Card.
This image was designed on a 16GB SD Card so if your card is bigger, you might have to extend the partition.
Once flashed, insert the SD Card into the SD Card slot and boot your AirFlash.
If you would like the work through the process manually, continue on below.
Second fastest way to build
It is possible to install the piCore OS to an SD-Card as outlined in this article, but rather than follow the steps to create and edit all the files, you can download all the required files at the github repo instead:
What is the rationale for the technology choices?
Originally the AirFlash was going to be created using the ESP32 and harnessing the WIFI features and available FTP library. However, USB library support was difficult to find. And I wasn't overly keen to implementing a bit banged mass storage USB driver.
Next I looked at the Raspberry Pi Pico and noticed it had some support for connecting a USB device. But I forgot that it didn't come with WIFI onboard. I didn't want to go into the complication of adding a module and then have casing considerations.
I settled on the Raspberry Pi Zero W as it features WIFI, USB and good library support through the OS. Having a few seconds boot up time with an OS seemed a fairly pragmatic choice.
For the OS, I chose piCore (a port of Tiny Core Linux), for it's robust use of persistence. Hard power cycles do not corrupt the data or OS content of piCore, so power can be pulled from the device without incident.
The piCore Operating System
For those wanting to build everything from scratch, let's go!
The OS chosen for this project is piCore for it's light payload, start up time and resilliance. All versions of piCore are located here: http://forum.tinycorelinux.net/index.php/board,72.0.html
I have used piCore-13.0.3 (32-bit): http://tinycorelinux.net/www/13.x/armv6/releases/RPi/
You will need to download this version of piCore to your PC.
I recommend downloading this specific version to your PC so that you can be sure the process will work for you.
Good instructions for installing piCore to a micro SD Card can be found here: https://www.maketecheasier.com/review-of-picore/
I used ImageUSB by PassMark to write the image to the SD Card, but there are loads of software options out there (like Rufus) that do the same job equally well.
Once you have written piCore to the SD Card from that article, head back here.
Boot up
On the root of the SD Card is the README which is worth copying to your PC and keeping aside.
Put the SD Card into the AirFlash, connect your HDMI to a TV or monitor. Connect power to the Micro-USB power port of the Pi Zero, and a Keyboard to one of the ports on the 4 port. piCore Linux will boot up.
Username: tc
Password: piCore
We need to connect to the device first like this so we can set up persistence, and then networking. That will allow us to continue setting up the device from our PC once SSH and a wireless access point are running on it.
Extended the partitions to allow saving
Use the README from the root of the SD Card to learn how to extend the Linux partition. Alternatively good instructions are also here. This will be required so that changes to piCore can be persisted and extra packages can be downloaded and installed.
Downloading all required extensions
There are a number of packages required to build the AirFlash. The sum total of packages, or extensions as they are called for piCore/TinyCore, are listed below.
Download each package and dependency file to your local PC, and copy them all to a USB stick:
Note: the nettle dependency comes from TinyCoreLinux 12.x instead of 13.x. This is because there is a dependency error for Samba in the 13.x packages.
Remove the USB stick from your PC and plug it into one of the AirFlash USB ports and then mount the drive.
After mounting the USB flash drive (usually this will be: mount /mnt/sda), you can copy these files to the /mnt/mmcblk0p2/tce/optional/ folder. This is where the system looks for tcz extensions.
Enabling WIFI
In order to make piCore load up these extensions on every restart, edit the onboot.lst file using sudo vi /mnt/mmcblk0p2/tce/onboot.1st.
Change the content to be:
firmware-rpi-wifi.tcz
wifi.tcz
openssh.tcz
Then reboot.
ifconfig -a should show a wlan0 entry.
Test the WIFI feature with: sudo wifi.sh. This will activate and ask to connect to an access point. Ignore and quit. Soon, the AirFlash will be THE access point.
Persist an IP address for AirFlash on wlan0
For now, ifconfig -a shows wlan0 but without an IP address. Make a script for starting up the network:
sudo vi /mnt/mmcblk0p2/tce/startairflash.sh
ifconfig wlan0 down
ifconfig wlan0 10.0.0.1 netmask 255.255.255.0 up
As you can see from above, 10.0.0.1 is the IP address chosen for the device which will become important later.
Make it executable with:
chmod 755 /mnt/mmcblk0p2/tce/startairflash.sh
Edit the bootlocal.sh file with sudo vi /opt/bootlocal.sh and add the following at the bottom:
while ! cat /proc/net/dev | grep wlan0
do
	echo Waiting for wlan0
	sleep 1
done

sudo /mnt/mmcblk0p2/tce/startairflash.sh
This will keep startup waiting until the hardware for wlan0 is available before initialising it with our startairflash.sh script.
Persist these changes to piCore with: filetool.sh -b
Then reboot.
ifconfig -a will show wlan0 with an IP address.
Creating the Access Point
Now we have a working wireless interface and WIFI. It's time to set up piCore to serve out an Access Point that other devices and computers can connect to.
Create the hostapd.conf file at /mnt/mmcblk0p2/tce/
Add the following to the file:
interface=wlan0
driver=nl80211
country_code=AU
ssid=AirFlash
hw_mode=g
channel=1
macaddr_acl=0
auth_algs=1
ignore_broadcast_ssid=0
wpa=2
wpa_passphrase=12345678
wpa_key_mgmt=WPA-PSK
wpa_pairwise=TKIP
rsn_pairwise=CCMP
Test the hostapd with:
tce-load -i hostapd.tcz
sudo hostapd hostapd.conf
Use your PC to test that you can see the AirFlash access point.
As set in the config above, when prompted for a password, use 12345678:
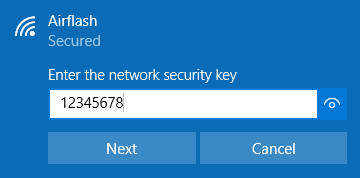
Note: If you are on Windows 10 and you don't see the AirFlash Access Point appear, click Network Settings, then Show Available Networks to refresh the Access Point list.

Next we need a DHCP server to allocate IP addresses to any device that connects to the AirFlash Access Point. For this, we'll bring in dnsmasq.
dnsmasq is being used for it's DHCP features, not for it's DNS features. Don't let the name throw you.
Head into the tce folder so we can create a couple of config files:
cd /mnt/mmcblk0p2/tce
First, load the extension with:
tce-load -i dnsmasq.tcz
Make an empty leases file with
touch ./dnsmasq.leases
Create the dnsmasq.conf using
sudo vi dnsmasq.conf
Add the following to the file:
interface=wlan0
bind-interfaces
domain-needed
bogus-priv
dhcp-range=10.0.0.2,10.0.0.50,12h
Then start it with:
sudo dnsmasq -C ./dnsmasq.conf -l ./dnsmasq.leases
Restart the wlan0 interface and access point with:
sudo ./startairflash.sh
sudo hostapd hostapd.conf
Now if you connect to the AirFlash access point, your PC will connect and will be given an IP address in the range of 10.0.0.x.
Excellent stuff. Now we have an access point and a DHCP service dishing out IP addresses to whoever should wish to connect. Now to provide Windows shares. But first we'll persist these changes so they don't get lost.
Persisting hostapd and dnsmasq between reboots
Edit the onboot.lst file with: sudo vi /mnt/mmcblk0p2/tce/onboot.lst to make it as:
firmware-rpi-wifi.tcz
wifi.tcz
openssh.tcz
hostapd.tcz
dnsmasq.tcz
Edit the bootlocal.sh file with sudo vi /opt/bootlocal.sh and add the following to the bottom:
hostapd /mnt/mmcblk0p2/tce/hostapd.conf &
dnsmasq -C /mnt/mmcblk0p2/tce/dnsmasq.conf -l /mnt/mmcblk0p2/tce/dnsmasq.leases &
Then persist with filetool.sh -b
Reboot and use your PC to connect to the AirFlash access point. You will get allocated an IP address.
If you do, then you have the beginnings of an AirFlash. However, you can't access any shared USB flash drives yet.
Connecting via Keyboard/HDMI or SSH
At this point, the WIFI access point is working so it is possible to continue the configuration via SSH if you so choose. Or you can continue to use the AirFlash like a computer using a screen and keyboard to complete the configuration.
Setting up Samba
We will use Samba as the way to share the USB flash drives.
Test load Samba with:
tce-load -i samba4
There are some extra run-time libraries needed to start samba 4. These are:
tce-load -i libattr.tcz
tce-load -i p11-kit.tcz
tce-load -i nettle.tcz
tce-load -i gmp.tcz
Create a samba folder and a smb.conf config file with sudo vi usr/local/etc/samba/smb.conf:
[global]
workgroup = WORKGROUP
netbios name = AirFlashNetbios
security = user
guest account = nobody
map to guest = Bad User
We won't be setting any permanent shared mounts for Samba as our USB drives inserted will be dynamic. We'll deal with this a little further down.
Persist Samba
To make piCore install the Samba extensions during boot:
sudo vi /mnt/mmcblk0p2/tce/onboot.lst
change the file to contain:
firmware-rpi-wifi.tcz
wifi.tcz
openssh.tcz
hostapd.tcz
dnsmasq.tcz
gmp.tcz
nettle.tcz
libattr.tcz
p11-kit.tcz
samba4.tcz
Then to make sure that the Samba folder changes are able to be persisted:
sudo vi /opt/.filetool.lst
Add the following lines at the bottom:
usr/local/etc/samba/
usr/local/var/
This will persist the samba folder and the smb.conf for all future reboots.
Start Samba to test and to create the required default files:
/usr/local/etc/init.d/samba4 start
Then to have this work on startup, add the same samba4 line above into the bottom of the bootlocal.sh script with:
sudo vi /opt/bootlocal.sh
filetool.sh -b to persist the changes inside /opt and inside the new samba folder.
Usershares
Usershares allow us to dynamically create or remove new shares while Samba is already running. To configure Usershares under Samba, add the following to the smb.conf Global section:
usershare path = /usr/local/var/lib/samba/usershares
usershare max shares = 100
#turn on usershare. 0 is off.
usershare allow guests = yes
usershare owner only = false
Next, make the actual required usershares folder and set the special permissions with:
cd /usr/local/var/lib/samba
sudo mkdir usershares
sudo chmod 1770 usershares
sudo chown -R nobody usershares/

filetool.sh -b
Insert a USB flash drive, and add a test usershare for a drive that can mount to /mnt/sda, with open permissions:
sudo net usershare add sdtest /mnt/sda "" Everyone:F guest_ok=y
Restart samba with:
sudo /usr/local/etc/init.d/samba4 restart
Then use your PC to connect to the AirFlash WIFI endpoint and connect to the device using your file manager with \\10.0.0.1
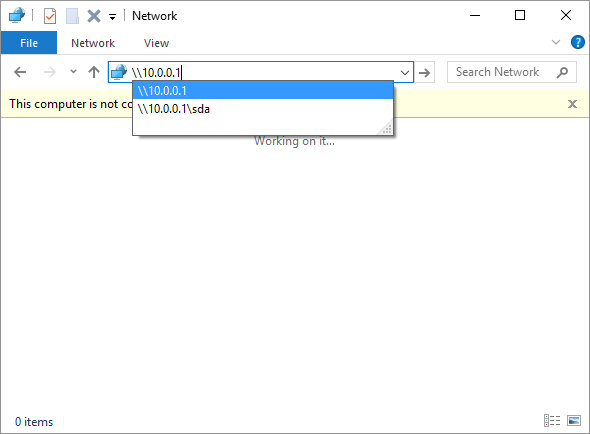
You will see a share and should be able to browse the files inside.
Automatically sharing connected USB Flash Drives
Every time that the kernel reports that a USB flash drive is inserted, we want it to:
- Auto-mount the USB device partitions.
- Auto-share out the mounted partition using Samba.
- Remove the share when the USB device is removed.
- Unmount the share.
- Then delete the share folder.
Create the following file at:
sudo vi /etc/udev/rules.d/999-usb-automount.rules
Add the following to the file:
KERNEL=="sd*", ACTION=="add",   SUBSYSTEM=="block", MODE="755", OWNER="nobody", RUN+="/usr/bin/mount /mnt/%k"
KERNEL=="sd*", ACTION=="add",   SUBSYSTEM=="block", RUN+="/usr/local/bin/net usershare add %k /mnt/%k '' Everyone:F guest_ok=yes"
KERNEL=="sd*", ACTION=="remove", SUBSYSTEM=="block",    RUN+="/usr/local/bin/net usershare delete %k"
KERNEL=="sd*", ACTION=="remove", SUBSYSTEM=="block",    RUN+="/usr/bin/fuser -mk /mnt/%k"
KERNEL=="sd*", ACTION=="remove", SUBSYSTEM=="block",    RUN+="/bin/umount /mnt/%k"
KERNEL=="sd*", ACTION=="remove", SUBSYSTEM=="block",    RUN+="/bin/rmdir /mnt/%k"
I'll explain the above briefly. If a USB flash drive is inserted (add), it's name will be mounted and added to the usershare folder. If the flash drive is removed (remove), the usershare will be deleted, fuser will drop any usages to the share, umount with unmount the share and rmdir will remove the share folder from /mnt. This gives us the most robust set up for inserting and removing random flash drives and USB sticks.
Add the following path:
etc/udev/rules.d/999-usb-automount.rules
to the bottom of the .filetool.lst file with:
sudo vi /opt/.filetool.lst

filetool.sh -b
Connecting a USB stick should make the drive appear when browsing \\10.0.0.1
Congratulations! You have successfully built an AirFlash. I hope you enjoy using it, and that it becomes a handy tool for a variety of situations.
Who knows, maybe even your IT department would appreciate having one on hand.
Troubleshooting
- Q. I booted the AirFlash and I see my USB flash drive sharing, but the drive content is empty.
- A. Ensure there is no USB flash drive attached when booting the drive. Wait until the AirFlash Access Point is showing before connecting a USB flash drive.
- Q. If giving “usershare allow guests” “is not enabled by this server” ***
- A. Ensure you have typed the correct settings in the smb.conf. Check for any typos.
- Q. I get a new share every time I remove and reinsert the same usb drive.
- A. Permissions are not set correctly on the usershares folder, or the
fuserorrmdirrule is missing from the rules file.
- Q. 0x8007003B interrupted action
- A. This is due to the level of Samba protocol supported. This might an issue in progress. See
Issuesbelow.
Issues
AirFlash works well, and does what it says on the tin. There are a couple of issues yet to resolve:
- Large files cause the copy dialogue on Windows to block with “Calculating…”. The file will successfully copy, but Windows may error suggesting that the file failed to copy, when in fact, it succeeds. A lot of research has gone into this issue, but no solid result so far.
- Start up time could be greatly improved.
References:
- Possible hint for setting up ftp: http://forum.tinycorelinux.net/index.php/topic,24776.0.html