Table of Contents
Ember Auto-tracking Object Arrays - Deep Dive
 There will be many times when an Ember application needs to work with simple temporary data (POJOs), but setting up models and working with Ember Data's store might be overkill.
The user might still want to bind this data to controls and have it perform dynamically when the data changes.
Let's explore some easy options.
Setting up a new project
Start a new project with:
ember new autotracked-arrays
Edit package.json to run from port 4300 in case you have another Ember app on the default 4200.
"start": "ember serve --port 4300",
Here is some styling to make the demo more pleasant to look at. Edit: app\styles\app.css
body {
    padding: 5px;
}

.box {
    border: 4px dashed #8888FF;
    background-color: #EEEEFF;
    margin: 5px;
    padding: 5px;
    width: 150px;
    text-align: center;
    display: inline-block;
    vertical-align: top;
    min-height: 110px;
}

.box .number {
    font-size: 50px;
    font-weight: bold;
}

.box .error {
    color: orange;
}

button {
    border: 1px solid blue;
    border-radius: 4px;
    padding: 5px;
}

.button-bar {
    padding: 5px;
}
Create a new terminal in vscode or open a bash window and start the app with: npm start.
Once the default page is up, remove everything from app\templates\application.hbs to get rid of Hammy Hamster and his friends.
Let's make a box component that can display some information as well as an error state:
ember g component box
Edit the markup file, box.hbs:
	<div class="box">
		<div class="number">{{@number}}</div>
		<div class="error">
			{{#if @error}}
				Error: {{@error}}
			{{/if}}
		</div>
	</div>
Next, create a container component where we can use our model data to display a number of boxes, and have some buttons to perform some experiments!
ember g component container --with-component-class
	<div>
		{{#each @boxes as |box|}}
			<Box @number={{box.number}} @error={{box.error}} />
		{{/each}}
	</div>

	<div class="button-bar">
		<button {{on 'click' this.addExtraBox}}>Add Extra Box</button>
		<button {{on 'click' this.changeContent}}>Change Content</button>
	</div>
Use the container component in our application template templates\application.hbs:
<Container @boxes={{@model}} />
Add a route to the application to create some initial data.
ember g route application
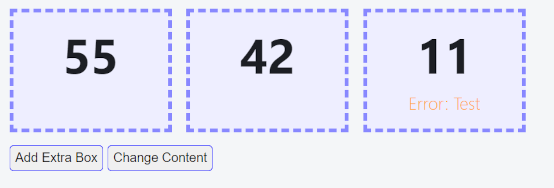
import Route from '@ember/routing/route';

export default class ApplicationRoute extends Route {
    model(){
        return [
            {
                number: 55,
                error: null
            },
            {
                number: 42,
                error: null
            },
            {
                number: 11,
                error: 'Error: Test'
            }
        ]
    }
}
Time to experiment
Excellent, we have three Boxes on the page inside our container. This is our starting point. How can we dynamically change the data on the screen using a tracked array of objects?
We can make a start by moving the data into a tracked property in the container component. The model data will be passed from the args to the tracked property. We'll also start adding some actions, as well as a selection of error messages to use for the boxes.
import Component from '@glimmer/component';
import { action } from '@ember/object';
import { tracked } from '@glimmer/tracking';

export default class ContainerComponent extends Component {
    @tracked boxes = [];
    errors = ['Invalid', 'Faulty', 'Disconnected', ''];

    constructor(owner, args) {
        super(owner, args);
        this.args = args;

        this.boxes = this.args.boxes;
    }

    @action addExtraBox(){
        this.boxes.push({
            number: 99
        });
    }

    @action changeContent(){}
}
In the above, the intention is to be able to contain the data in the tracked property which will dynamically change the boxes on screen. This will be done by clicking a button, which will add another Box to our collection of Boxes.
The Container component needs to be changed to source from the this.boxes tracked variable rather then the @boxes model passed in from the route.
The data format for each Box is the following:
{
	number: 99,
	error: 'Error'
}
We won't be using an Ember model, just a plain javascript object.
Array's push and self-assign
The bottom line is, our addExtraBox() function does not trigger any change to the tracked this.boxes variable. Ember doesn't see it as a change. However, in a strange twist of fate, assigning this.boxes to itself will trigger a change:
    @action addExtraBox(){
        this.boxes.push({
            number: 99
        });

        this.boxes = this.boxes;
    }
Our container re-renders the boxes to suit.
Spread operator
For the second way to deal with the problem, let's try adding our new object to the array using the spread operator:
    @action addExtraBox(){
        const newBox = {
            number: 99
        };

        this.boxes = [...this.boxes, newBox];
    }
This works too. The spread operator is only a deep copy of the first layer, [https://medium.com/@kevinlai76/the-spread-operator-deep-and-shallow-copies-d193ac9b58bf | not the nested data]. Which is not a deep copy at all in my book. But it is enough to trigger a change in Ember. But we'll come back to this point a little later.
Ember's pushObject
Let's move to trying Ember's pushObject function which is attached to all javascript arrays:
    @action addExtraBox(){
        this.boxes.pushObject({
            number: 99
        });
    }
And this works too. Ember sees the change to the array and will render the new Box. This version has the advantage of not needing to copy the this.boxes variable onto itself in some fashion.
But please don't run off now if you think this solves your problem! There is more.
Changing object values in the array
Adding or removing from the array is one issue, but changing an individual property in a specific object contained in the array is another problem altogether. Ember is not able to track this level of change without help.
Imagine the scenario where validation was run over our boxes data, and some numbers were considered invalid, and that we needed to show validation messages in each box?
We have provision for this in our data structure with the error property.
Let's try to randomise the numbers, and the error messages to see if they will re-render.
Let's use the Change Content button in the Container markup:
<button {{on 'click' this.changeContent}}>Change Content</button>
Then create new changeContent action to change all the inner properties of the objects in the array:
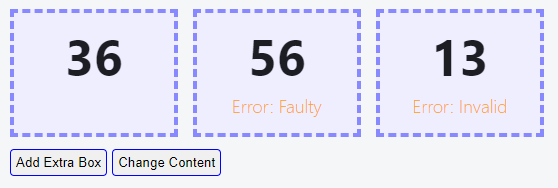
    @action changeContent(){
        this.boxes.forEach( box => {
            box.number = Math.floor(Math.random() * 100);
            box.error = this.errors[Math.floor(Math.random() * this.errors.length)]
        })

        this.boxes = [...this.boxes];
    }
Click the Change Content button. It doesn't work. Any why not? To Ember, the array hasn't changed. It's not shorter or longer, it has no idea what has happened. Even though the values inside each object have been changed, the spread operator is not a deep copy and Ember's auto tracking won't see it.
Solve with stringify/parse
So what can we do? Turns out, there is a simple solution which is to use JSON.stringify on our array and then JSON.parse to create a true deep copy of it.
Assign the result on top of the original array. Ember will track this change:
    @action changeContent(){
        this.boxes.forEach( box => {
            box.number = Math.floor(Math.random() * 100);
            box.error = this.errors[Math.floor(Math.random() * this.errors.length)]
        })

        this.boxes = JSON.parse(JSON.stringify(this.boxes));
    }
This is probably the fastest and easiest take-home fix for tracking object arrays in Ember. There are other options worth exploring, but not as simple. Maybe for another time.
Resources
https://www.tutorialspoint.com/what-is-the-most-efficient-way-to-deep-clone-an-object-in-javascript https://guides.emberjs.com/v3.28.0/in-depth-topics/autotracking-in-depth/#toc_plain-old-javascript-objects-pojos https://guides.emberjs.com/v4.4.0/in-depth-topics/autotracking-in-depth/
Thank you
Huge thanks to Julien P for nutting over the original problem with me which served as the basis for this article.